WordPress Theme Guide: Meris
Theme Introduction
Meris is a fully responsive theme designed by Magee. It includes the free version and the professional version. The free version provides a dedicated-designed homepage and allows you to add sections to the homepage; while the professional version gives you more power to customize the homepage including almost everything. Other features shared by the two versions including full screen sliders, portfolios, slogans, Metabox options, and so on. This guide will show you in details how to use this theme.
Install the theme
1. Download the theme
Click the Download link to download the theme to your computer.
2. Install the theme
Go to your WordPress Dashboard-Appearance-Theme, hit Add New button and then click Upload theme to upload the meris.zip file.
3. Active the them
Hit “Activate” to active it after the theme is uploaded and installed successfully.
Header Settings
1. Site title
After login your dashboard, go to Setting-General, set your site title and title tags. 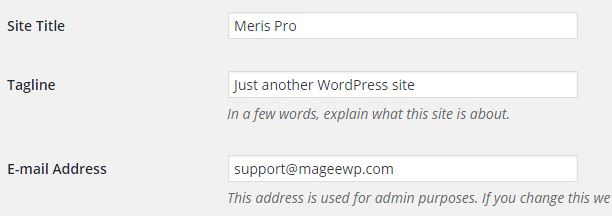
2. Logo and Favicon Setting
Go to Dashboard -> Appearance -> Meris Options, navigate to General Options. Upload a logo or Favicon image, or enter an image URL in the corresponding area. A logo is necessary if you have a brand of your own, but a favicon image is not. 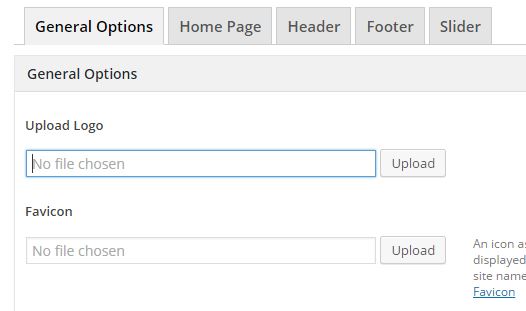
3. Sticky Header
Go to Appearance - Meris Options, hit Header Tab. You can choose to display the sticky header or not. 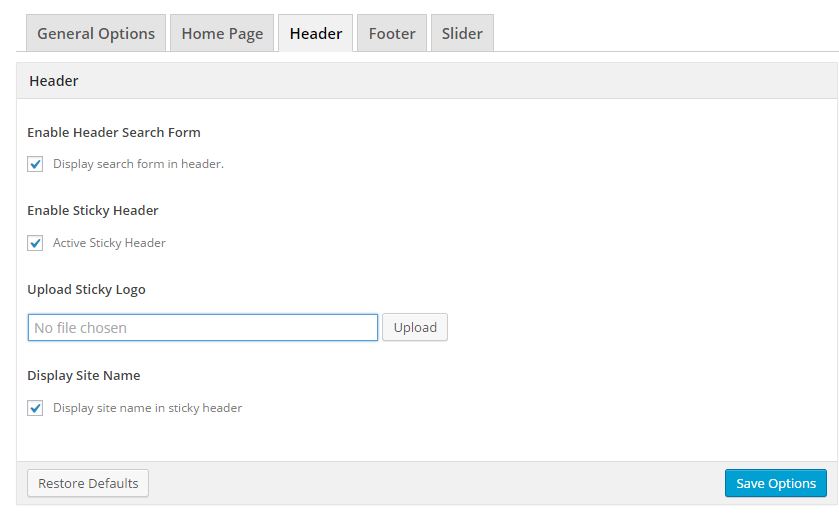
4. Search Bar in Header (Pro Version)
In this page, you can also hide the search bar in header.
Slider Settings
1. Upload images
In Meris Options, go to Slider tab, upload an image to each slide.
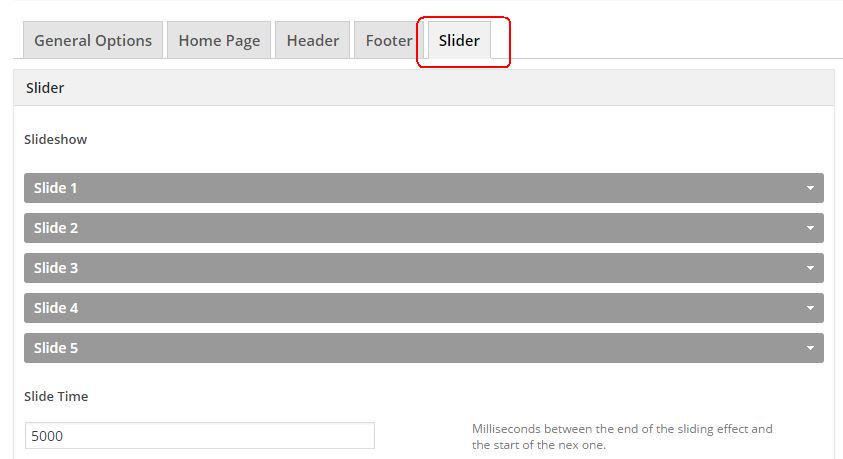
2. Add text to slider
Go to the Text box below, input the texts you want to show in the slide. You can add links in the text.
3. Add link to slider
Add the link to the box below Link 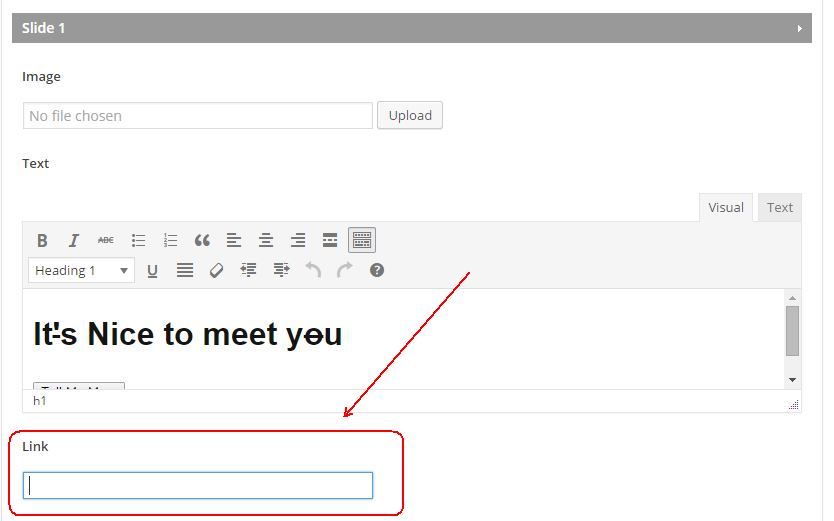
4. Set slide time
The slide time is the transition time between two sliders, set the time duration you need.
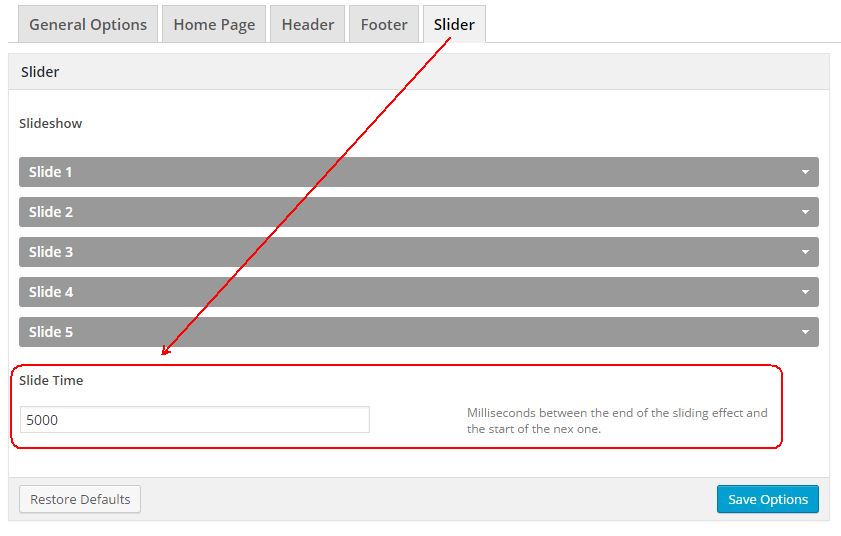
After finish all settings, hit Save Options to save the changes.
Setup homepage and blog page
Go to Pages – Add New, name it Blog or anything you need. Choose sidebar layout in Meris Metabox Options, publish the page with no content.
Then go to Appearance - Meris Options, hit Home Page tab and activate homepage layout. 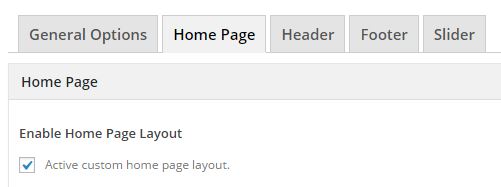 Go to Settings - Reading, and set like the following picture:
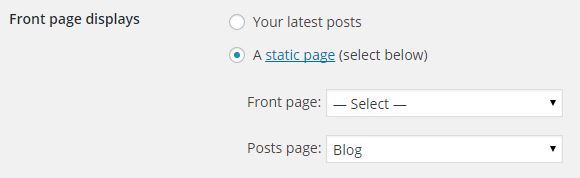
Home Sections
After activated the homepage, you could go to Appearance – Widget to start adding sections to this page. You can drag & drop unlimited widgets to the set sections. 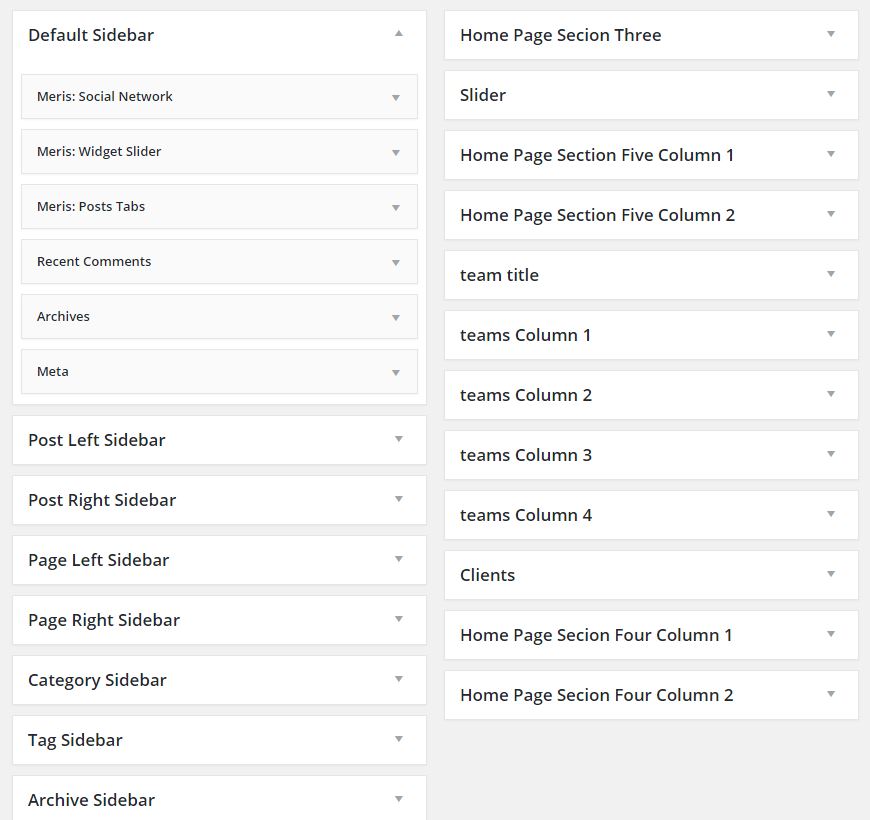
Now Meris allows you to customize the homepage sections. (*New)
1. Add Sections
In the Meris Option-Home Page, select the column number you need and define the section name in the Widget Area Name, then hit the Add Item icon. The section would appear at the bottom of the sections. 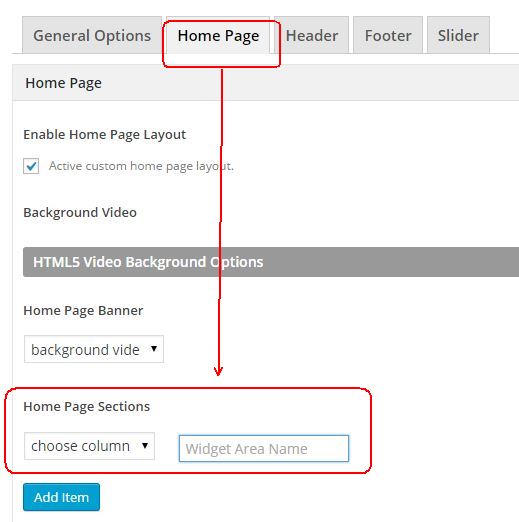
2. Edit or Remove Sections
Click Edit to set background color, upload background image, and set the position for the image. You can also choose layout as boxed of full width here. Remember to hit Save Options button at the bottom. 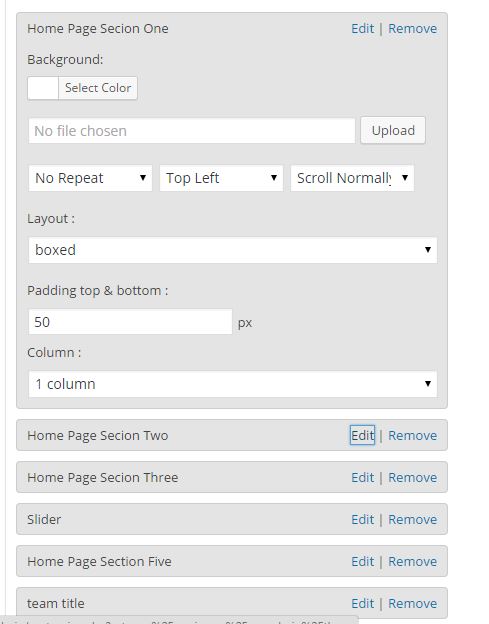
You could select the section you need to set the position for, move it up and down to sort the sections.
If you want to remove the section, click Remove.
Widgets
In lite version, we offer Service, Slogan, Portfolio, Team and Contact Form for Homepage layout. And you can also add Section Title and Divider to any section. Remember to click Save button for each widget.
1. Service
Go to Appearance – Widget page, drag and drop Meris: Service widget to any section, and select 1-4 pages to display in this section.
You can use Font Awesome Icons or custom images as icon for each service.
A. Using Font Awesome Icons
Open the Font Awesome Icon page: fontawesome, copy the icon name, and paste it to the icon box. 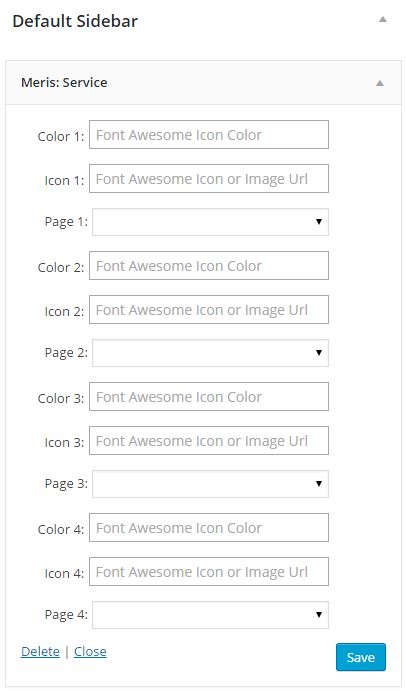
To set the size of the icon, add fa-lg, fa-2x, fa-3x, etc. at the end of the icon name, for example, the icon name is “fa fa-leaf” and you want to magnify it to 5 times, add “fa-5x” to the end of “fa fa-leaf”, that is “fa fa-leaf fa-5x”. 
B. Upload an image
Go to Media, hit “Add New” to upload your custom image and then hit “Edit” to open the file page, copy the File URL of the image, paste it to the icon box.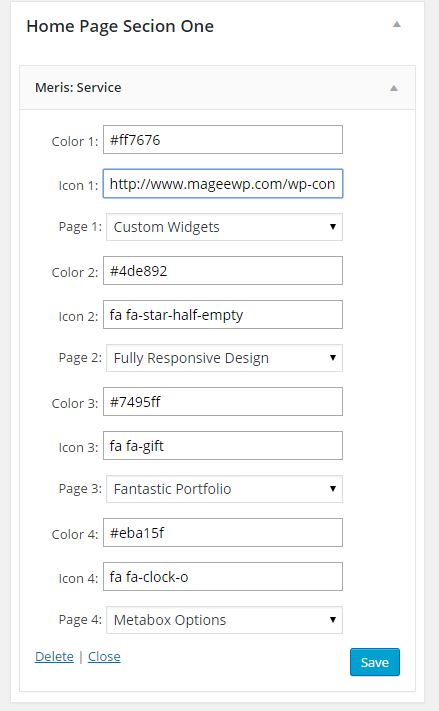
After finish settings, hit Save button and then click close to quit the setting box.
2. Slogan
Drag the Meris: Slogan widget to any section (Full width section is recommended). Then input some text to the widget. You can add title and change background-color for this widget. 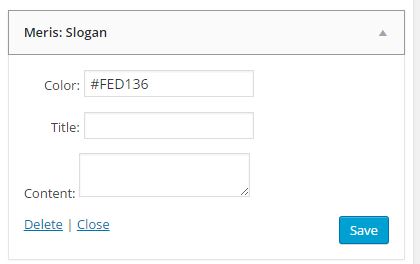
3. Portfolio
A. Add Featured Image
Before add portfolio to the homepage, you need set featured images in the posts or pages that you want to link to.
When you post a page or a blog post, in the right bottom corner, set a featured image. 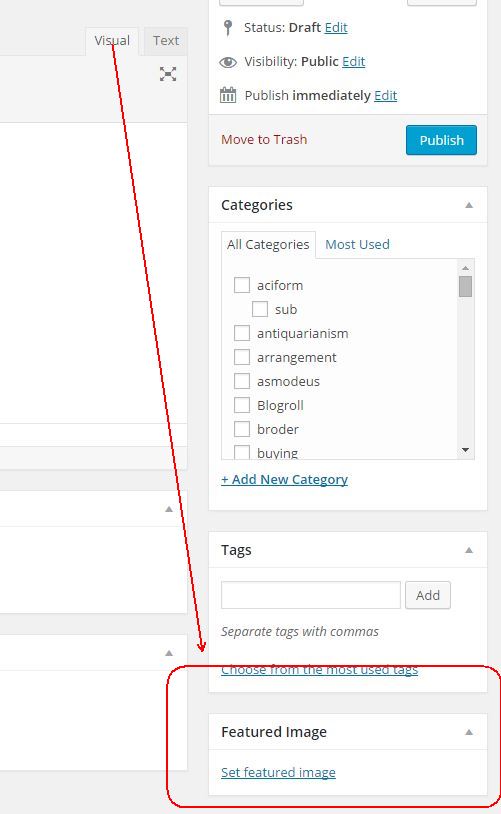
B. Link a portfolio to pages
Drag&drop Meris: Portfolio widget to any section. Here you need to finish the following settings:
Choose the pages you want to add to portfolio, the featured images you set in the pages will appear in the portfolio section in the homepage. 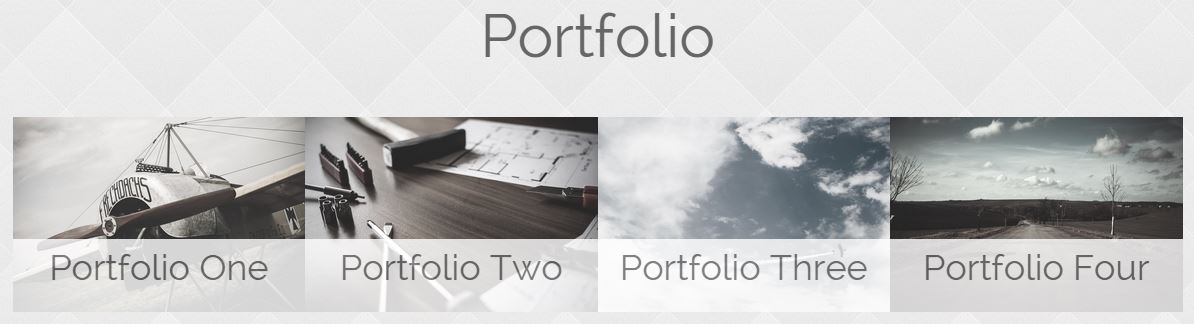
4. Contact Form Setting
Drag the Meris: Contact Form and drop it to any section, then open it, put your own email address to the box. 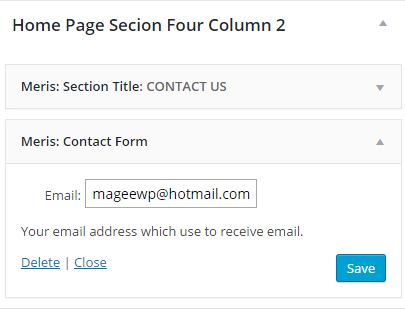
5. Team
A. Add Team Section
In the Meris Option-Home Page, choose “4 columns”, add section name “Teams” and click “Add Item”. 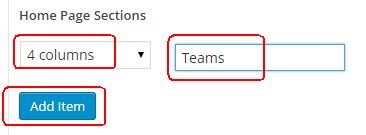
B. Add Team Widget
Drag the Meris: Team and drop it to the Teams Column One (or Two), then open it, fill in the infos and click “save”. 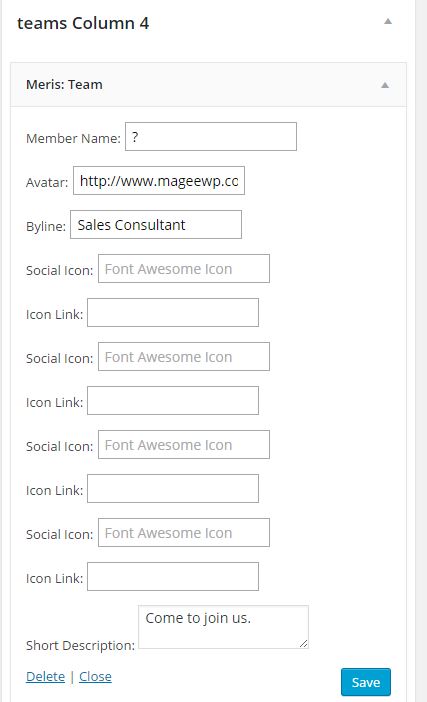 Repeat this work to other columns.
6. Section Title & Divider
You can drag&drop to add Meris:Section Title widget. 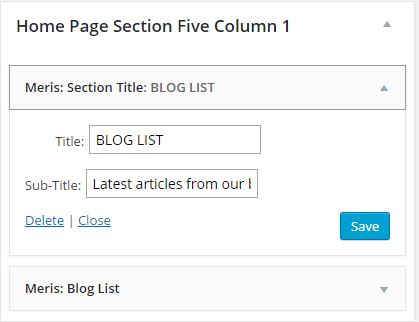
Also you can add margins between two widgets using Meris:Divider widget.

Widgets only for pro version
In addition to the above, we offer more widgets in pro version.
1. Blog list
Helps you to display the latest blog posts.
2. Carousel
To display clients and/or partners.
3. Progress bar
To show your progress or skills.
4. Testimonial
You can demonstrate your clients’ testimonial.
5. Revolution Slider plugin
First you need to create a slider using this plugin. Then you can drag&drop the widget to any section and choose the slider you created before. We recommend you add this widget to section with full width layout.
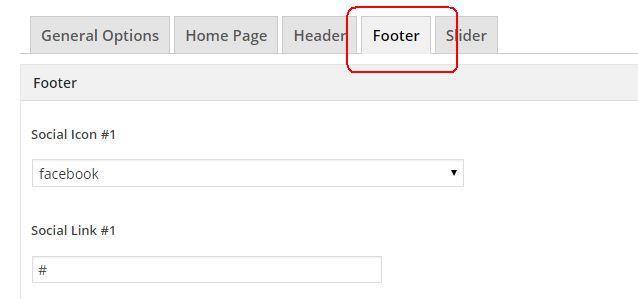
Footer Settings
In the Meris Option-Footer tab, add social network links to the corresponding boxes, and in the copyright box, add the information you need.
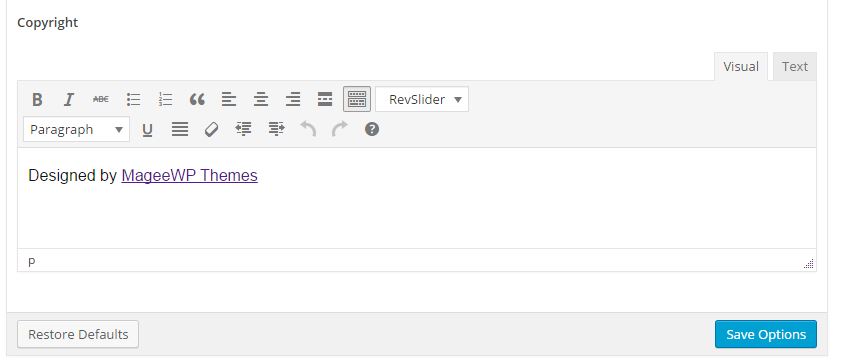
In Meris Pro, You can erase or change for something else for the copyright information note in the footer.
Sidebar Settings
Meris supports multiple sidebars. You can customize sidebars for Pages and Posts separately.
1. Set Sidebar content
Go to Appearance-Widget page, in the third column, you can set each sidebar. Drag and drop the Widget, for example, the Text widget to the Post Left Sidebar. Then add contents to the text box. 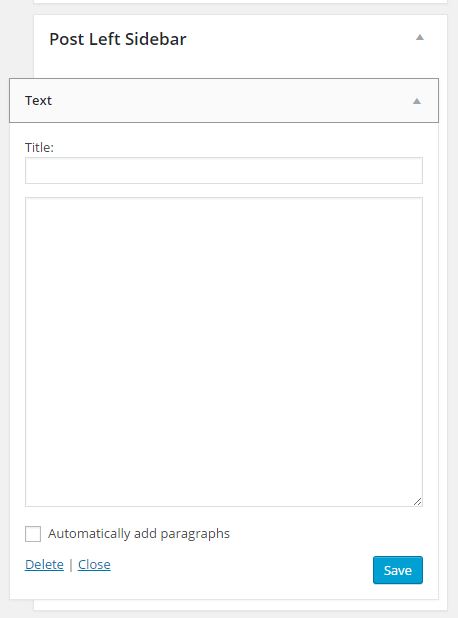
2. Set Sidebar Position
When you post blog posts, in the Metabox option, choose Left Sidebar, the Post Left Sidebar will appear. Similarly, you can set other sidebar, and choose where to add the sidebar.
Optional Setting: Creating A Menu
You can edit and use the default menu or create a new menu if necessary.
As a menu needs to add items to it, you need to post some pages, and add some categories in your site.
1. Defining a Menu
You need to define a menu before you can add items to it.
From the Appearance - Menu, select the ‘Menus’ option to bring up the Menu Editor.
Select Create a new menu and name it.
Click the Create Menu button. 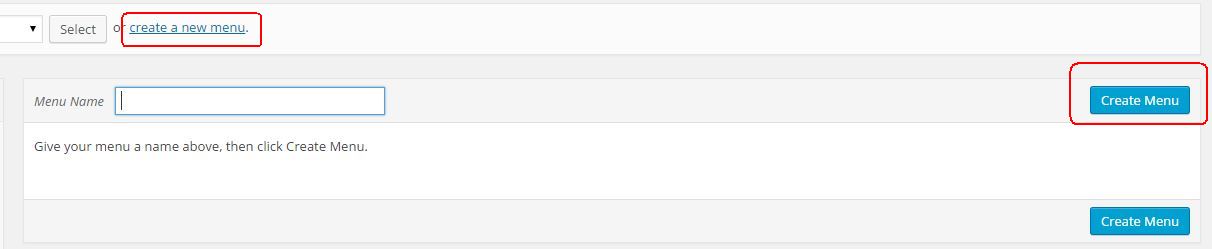 You new menu is created now.
2. Adding Items to a Menu
On left side in the menu editor page, you can see all pages, links, and categories are listed there. Take adding pages for example here.
Click View all link to bring up all pages, and click the checkbox before the pages and hit Add to Menu button at the bottom. Finally, hit Save the menu, your custom menu is now saved. 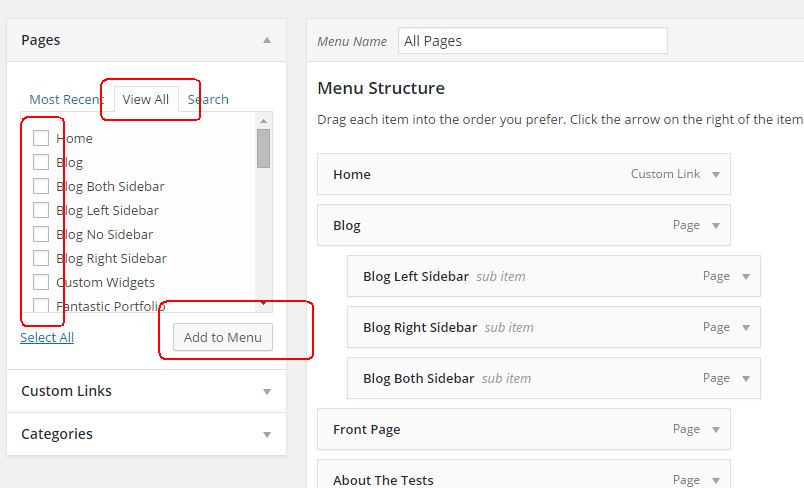
3. Changing Menu Structure
You can move the items in the menu to change the menu structure. You can change the order of the items and the level of each item to change the structure. Hit Save Menu to save all changes.
Meris Metabox options
These options are for pages and posts. When you edit your pages and posts, below the editor, you can find the Meris Metabox Options. You choose either to display breadcrumb or not and set layout for your pages and posts.
HTML5 Video Background (Pro version)
First upload the HTML5 video to your site using ftp tool. The video needs to be at least in mp4 & webm formats. And you also need to upload a alternative image as poster.
Then go to Appearance – Meris Options – Home Page, click the HTML5 Video Background Video Options title to expand the task.
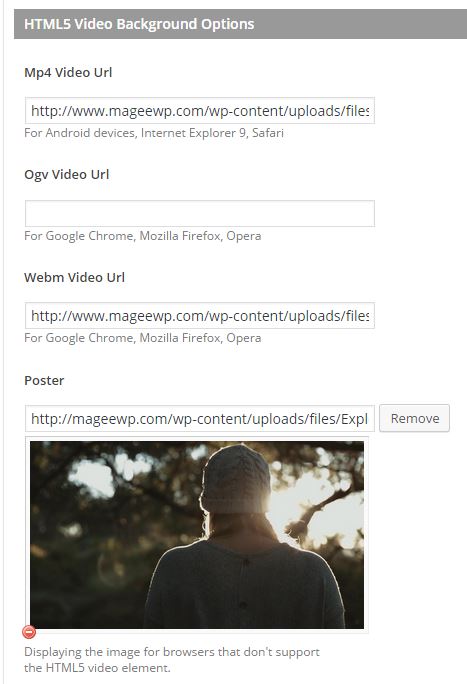
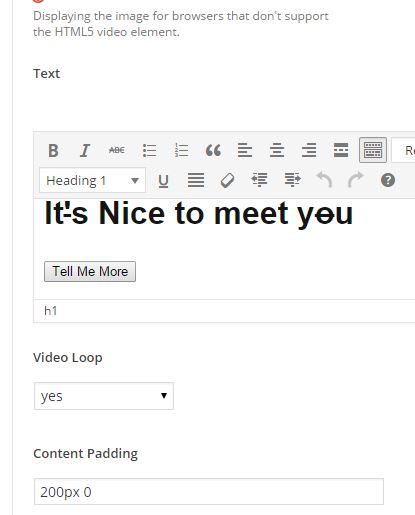
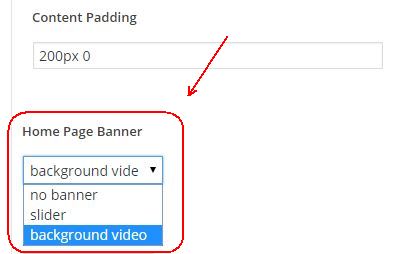
Fill in the urls of the video. Add captions, set loop or not, and set content padding.
At last choose Background video as Homepage Banner (In pro version if you want the slider to be banner, you also need to set it here).
Remember to click the “Save Options” button at the bottom.
Other Settings
1. Global color setting
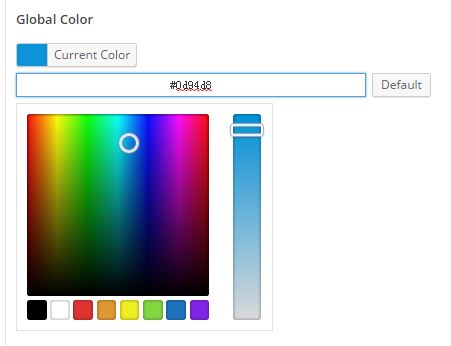
In the Meris Options / General Options, go to the Global Color, pick a color as the color of structure part.
2. 404 Page content
404 page content is used when a page is not found, the content will be displayed there. All the pages that are not found will be directed to this page.