Style Your WordPress Themes Comment Form
In this article, we will show you how to style WordPress themes comment form and take it to the next level by adding social logins, subscribe to comments, and more.
Changing Comment Form Style in WordPress
Each page on your website contains default WordPress generated css style classes. Inside most WordPress themes there is a template called comments.php which is used to display comments and comment form on your blog posts/pages. The WordPress comment form is generated using the function <?php comment_form(); ?>.
By default this function generates your comment form with three text fields (Name, Email, and Website), a textarea field for the comment text, and the submit button. You can easily modify each of these fields by simply tweaking the the default CSS classes. Below is a list of the default CSS classes that WordPress adds to each comment form.
#respond { } #reply-title { } #cancel-comment-reply-link { } #commentform { } #author { } #email { } #url { } #comment #submit .comment-notes { } .required { } .comment-form-author { } .comment-form-email { } .comment-form-url { } .comment-form-comment { } .form-allowed-tags { } .form-submit
By simply tweaking these CSS classes, you can completely change the look and feel of your WordPress comment form. Let’s go ahead and try to change a few things to get a good idea.
First, we will start by highlighting the active form field. Highlighting the currently active field makes your forms more useful for people with special needs and it also makes your comment form look more lively.
#respond { background: #ececec; padding:0 5px 0 5px; } /* Highlight active form field */ #respond input[type=text], textarea { -webkit-transition: all 0.30s ease-in-out; -moz-transition: all 0.30s ease-in-out; -ms-transition: all 0.30s ease-in-out; -o-transition: all 0.30s ease-in-out; outline: none; padding: 3px 0px 3px 3px; margin: 5px 1px 3px 0px; border: 1px solid #DDDDDD; } #respond input[type=text]:focus, textarea:focus { box-shadow: 0 0 5px rgba(81, 203, 238, 1); margin: 5px 1px 3px 0px; border: 1px solid rgba(81, 203, 238, 1); }
Below is how our form looked like in WordPress Twenty Twelve theme:
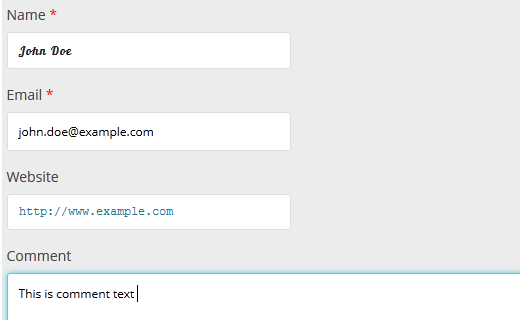
Using these classes you can change the behavior of how text appears inside input boxes. We will go ahead and change text style of the author name field, and the URL field.
#author { font-family: Lobster, "Lobster 1.4", "Droid Sans", Arial; font-size: 16px; color:#1d1d1d; letter-spacing:.1em; } #url { color: #21759b; font-family: "Luicida Console", "Courier New", "Courier", monospace; }
Notice in the screenshot below that the name field font is different then the rest. Also the text in the URL field is now the color blue.
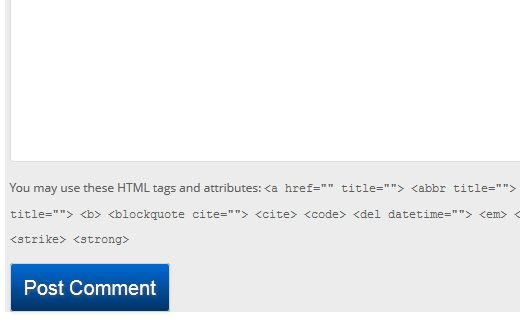
You can also change the style of WordPress comment form submit button. Instead of using the default submit button, let’s give it some CSS3 gradient, and box shadow.
#submit { font-family: Arial; color: #ffffff; font-size: 20px; padding: 10px; text-decoration: none; box-shadow: 0px 1px 3px #666666; -webkit-box-shadow: 0px 1px 3px #666666; -moz-box-shadow: 0px 1px 3px #666666; text-shadow: 1px 1px 3px #666666; background: -webkit-gradient(linear, 0 0, 0 100%, from(#006ad4), to(#003366)); background: -moz-linear-gradient(top, #006ad4, #003366); } #submit:hover { background: -webkit-gradient(linear, 0 0, 0 100%, from(#003366), to(#006ad4)); background: -moz-linear-gradient(top, #003366, #006ad4) }
Taking Comment Forms to the Next Level
You are probably thinking that was too basic. Well we have to start there, so everyone can follow along. You can take your WordPress themes comment form to the next level by adding various other elements such as social login, subscribe to comments, subscribe to newsletter, comment guidelines, quicktags, and so much more.
Add Social login in WordPress Comments
Let’s start with adding social logins to WordPress comments. First thing you need to do is install and activate the WordPress Social Login plugin.
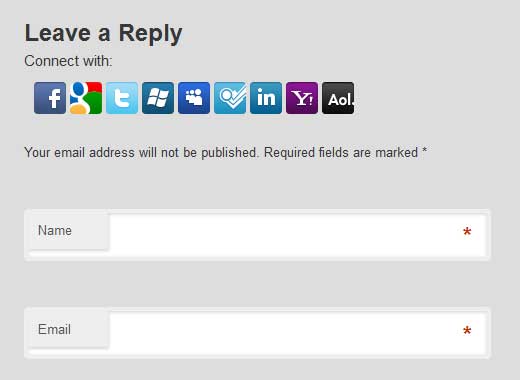
Once activated, go to Settings » WordPress Social Login. You will have to provide an app ID and app Key for Twitter, Facebook and Google. The plugin will provide you with step by step instructions on how to setup your app on each of those platforms. You don’t need to add all the networks either. You can simply choose to add the ones that you want (i.e twitter & facebook). Once you are done with the configuration and saved the settings, click on the Widget tab and scroll down to Advanced Settings. There you can choose where you want login buttons to appear. You can choose to have social login buttons on either the comment form, login page or both of them. You can also edit the CSS style for social login buttons on this page.

This will add social logins like this on your comment form:
Add a Subscribe to Comments Checkbox in WordPress
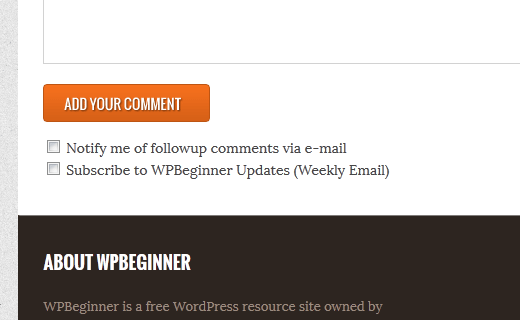
When users leave comment on your website, they might want to follow up on that thread to see if someone has replied to their comment. By adding a subscribe to comments checkbox, you enable users to receive instant notifications whenever a new comment appears on the post. To add this checkbox first thing you need to do is install and activate Subscribe to Comments plugin. Upon activation, the plugin adds a checkbox with the text “Notify me of followup comments via e-mail” below the comment form.
Now the Subscribe to comments will notify the user of all comments on that post. If you only want to notify them for replies on their comment, then look at this plugin called: Send Email only on Reply to My Comment.
Note: You can only use one or the other. You can’t use the two combined.
Add Quicktags in Comment Form
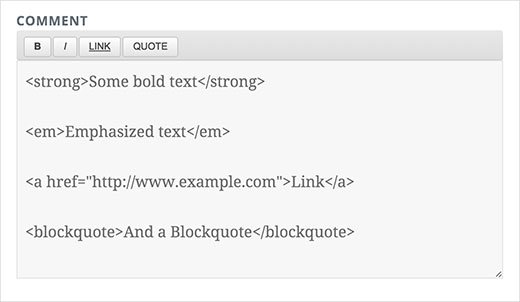
Quicktags are buttons that you can offer users to easily style their comments. For example a simple button to bold highlighted text is a quicktag. When you see a toolbar that has the option to bold, italicize, add headings, etc, those are all quicktags. If you want to add a quicktag in your comment form, then you are in the right place.
First thing you need to do is install and activate the Basic Comment Quicktags plugin. Once activated, you need to visit Settings » Discussion page and check the box next to quicktags option.
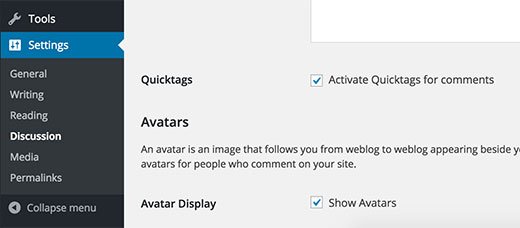
Click on the save changes button to store your settings. You can now visit a single post on your website and scroll down to the comments form. You will see a basic formatting toolbar above the comment text area.