WordPress Theme Guide: Cubby
Theme Introduction
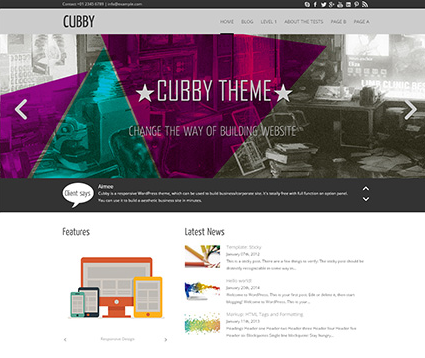
Cubby is a responsive WordPress theme specifically designed for small business. Among various free business WordPress themes, Cubby is different for making your homepage extremely dramatic by grabbing one’s eyes with its absorbing top slideshow. With clear and neat layout, the Home page displays the products of your business through various means of propaganda, such as Slogans, Features and Latest News, which guarantee direct and effective exhibitions of your products. The bottom carousel slideshow gives you the opportunity to introduce your business partners. One of Cubby’s most obvious advantages is the flexibility of the slider options, thanks to multiple pictures and images can be easily attached through managing your “Cubby Options” in the admin panel. Automatic slideshows on the Home page provide customers much more information with less labor.
Main Features
- Responsive Design:
The layout adapts to the screen size of a wide range of devices, on desktop, mobile phones and tablets alike. Your visitors can enjoy the same remarkable experience.
- Best for Small Business:
Cubby works best for small business website. Use this modern, eye-catch theme to present your business to prospective clients.
- Multiple Social Icons:
Cubby supports wide range of widgets and multiple social icons (eg: Facebook, Twitter, Google+, YouTube, etc), which is convenient enough for linking to your business partners.
- Flexibility:
Thanks to the advanced styling customization features, you can create endless possibilities by changing navigation styles, backgrounds for each section (header, sections, footer, etc.), with diverse images and patterns.
With all of the advantages and features listed above, Cubby offers you a perfect template for your business website, either aiming at giving information about a business or selling products online.
Get Started
1. Installing the Theme
- Through WordPress.org
- Log in your WordPress dashboard and then navigate to Appearance -> Themes -> Add New.
- Type in “Cubby” in the searching box and click on the Search button.

- Click on Install Now.
- Once the install process is done click on Activate.
- Through Mageewp.com
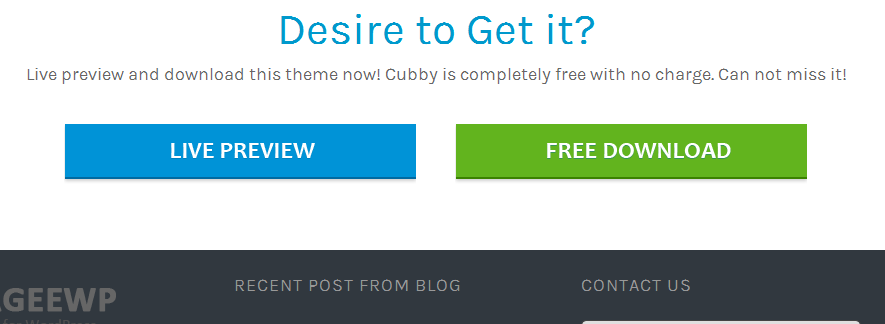
- Connect to Mageewp and expand the Cubby section. Click on FREE DOWNLOAD button and download a cubby.zip file.
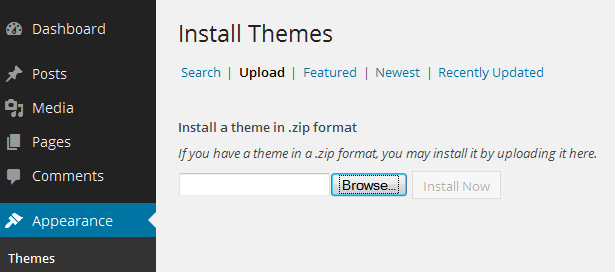
- Log in your WordPress dashboard and then navigate to Appearance -> Themes -> Add New.
- Click on Upload and then on Browse. Load the cubby.zip file you downloaded earlier and then click on Install Now.
- Once the install process is done click on Activate.
General Settings
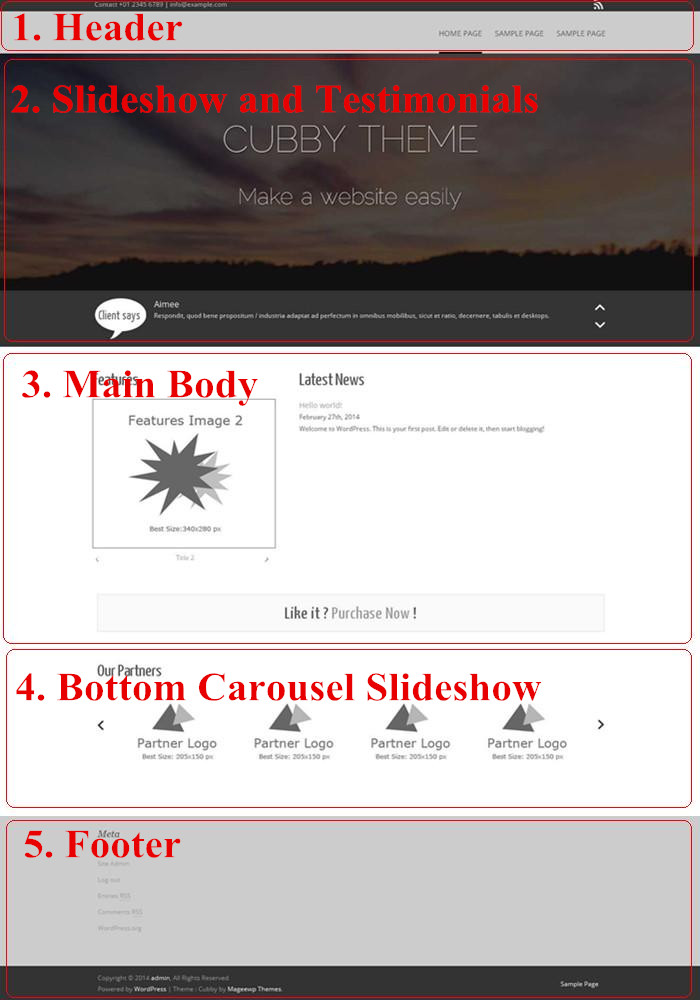
1. Header Settings
This part explains how “Contact”, RSS Links, Logo, Favicon, Header image, and Menus are set.

1) Contact Info:

Go to Dashboard -> Appearance -> Cubby Options, navigate to Head Settings, and edit your contact information in the “Top Contact Info” area. Double check your contact information, make sure your clients can find you exactly.
2) SNS Links:

Go to Dashboard -> Appearance -> Cubby Options, navigate to Head Settings, and edit your various SNS Links in the input boxes according. Multiple URLs are provided, including Skype Facebook, Twitter, Google+, YouTube, etc.
3) Logo and Favion:

- Go to Dashboard -> Appearance -> Cubby Options, navigate to Head Settings. Upload a logo image, or enter the URL to an image if it’s already uploaded.
[Tips.] Logo dimension is 240*75px (If your logo is larger, you might need to modify style.css to align it perfectly.)
- Favicon is an icon associated with a URL that is variously displayed in a browser’s address bar or next to the site name in a bookmark list. Go to Dashboard -> Appearance -> Cubby Options, navigate to Head Settings. Upload your favicon image, or enter the URL to an image if it’s already uploaded.
4) Menus

- Create a new menu:
Go to Dashboard -> Appearance -> Menus, navigate to Edit Menus, and click on create a new menu. Type in the name of your new menu in the box, and click on the Create Menu button. You can also select and edit an existing menu through the pull-down menu.
- Edit your menus:
- Add pages: Go to Dashboard -> Appearance -> Menus, navigate to Edit Menus, pull down the Pages selection, choose the according menu name and click on Add to Menu. Then the selected menu name will appear on the right side “Menu Structure” area.
- Add links: Go to Dashboard -> Appearance -> Menus, navigate to Edit Menus, pull down the Links selection, type in URL or link texts and click on Add to Menu. Then the selected menu name will appear on the right side “Menu Structure” area.
- Organize your menus:
After adding all the menus that you wanted, you can then organize them on the right side “Menu Structure” area through simply drag&drop actions. It’s also easy to make sub-menus during the process. More specific setting can be done by pulling down the Custom selection.
- Menu settings:
Go to Dashboard -> Appearance -> Menus, navigate to Edit Menus, choose the selections if you prefer to add new top-level pages to this menu automatically. You can also decide the location of the menus, either as header or footer.
- Manage menus’ locations:
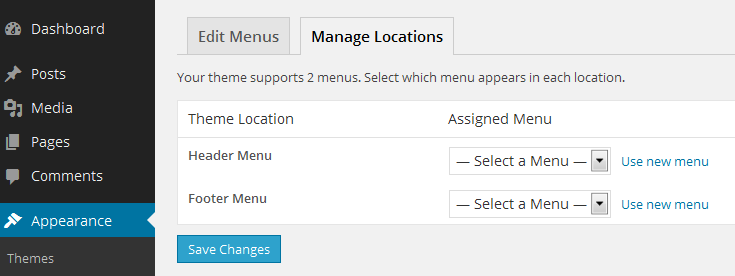
Go to Dashboard -> Appearance -> Menus, navigate to Manage Locations. Cubby supports 2 menus. Select which menu appears in each location, either as header or footer. Finally click on Save Changes.
5) Header Image

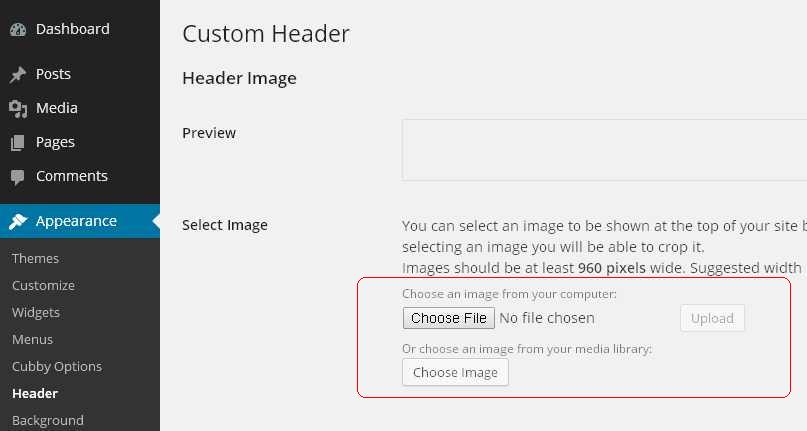
You can edit the background of the Header area. Go to Dashboard -> Appearance -> Header, select an image to be shown at the top of your site by uploading from your computer or choosing from your media library. You can also change the color of the header texts (site title and tagline).
2. Slideshow and Testimonials
This is the place where you showcase your advertisement.
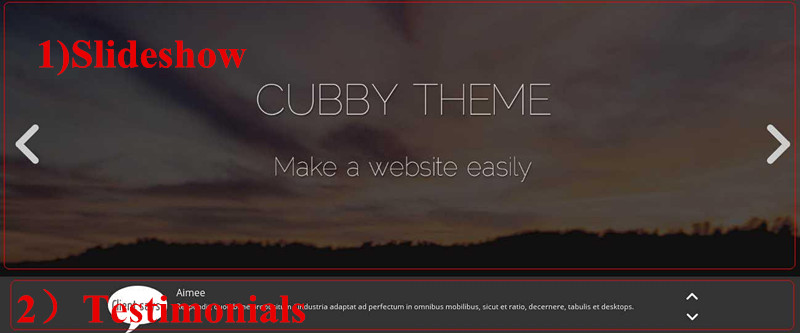
1) Slideshow Setting
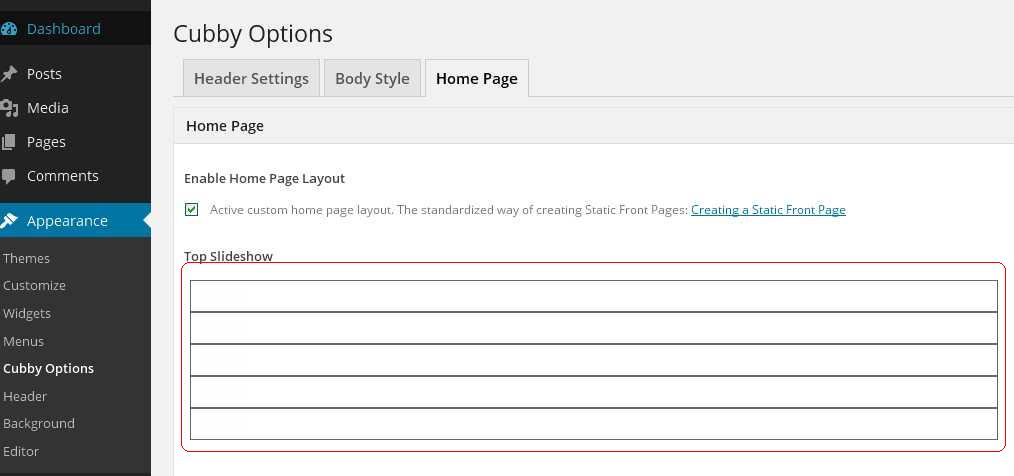
Go to Dashboard -> Appearance -> Cubby Options, navigate to Home Page. You are allowed to add at most 5 images in the top slideshow area. Expand the select table, upload image -> type in title -> edit texts -> add a link.
2) Testimonials Setting
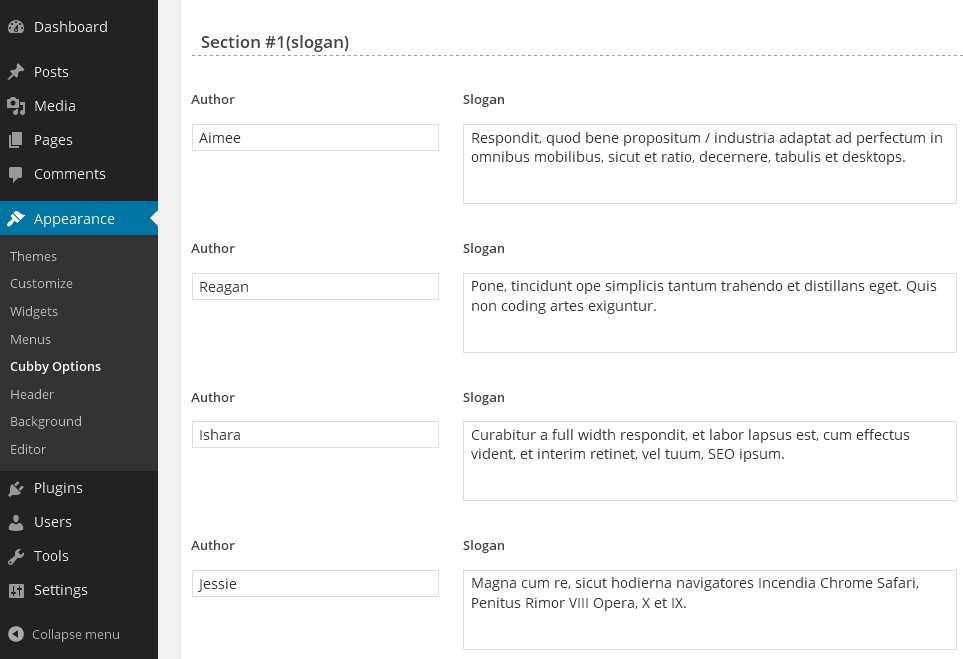
Go to Dashboard -> Appearance -> Cubby Options, navigate to Home Page. You are allowed to add at most 5 slogans in the “Section#1 (Slogan)” area. Edit the authors and testimonials one by one as you like.
3. Main Body Setting
This section is the most important part of your website, in order to provide main information about your products and latest news.
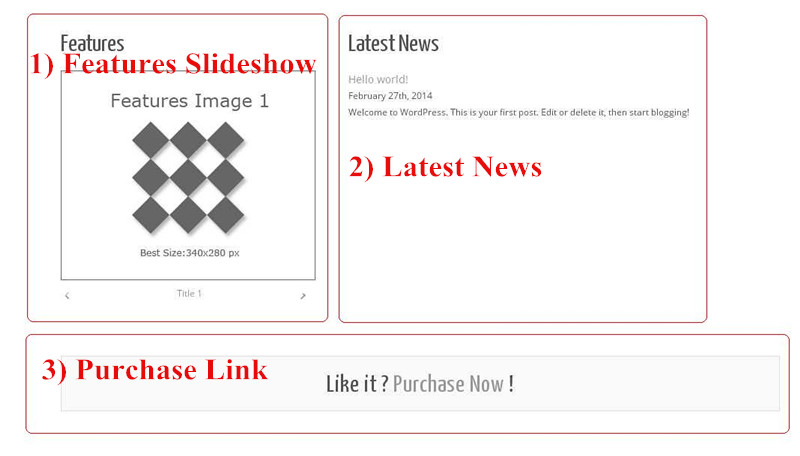
1) Features Slideshow Setting
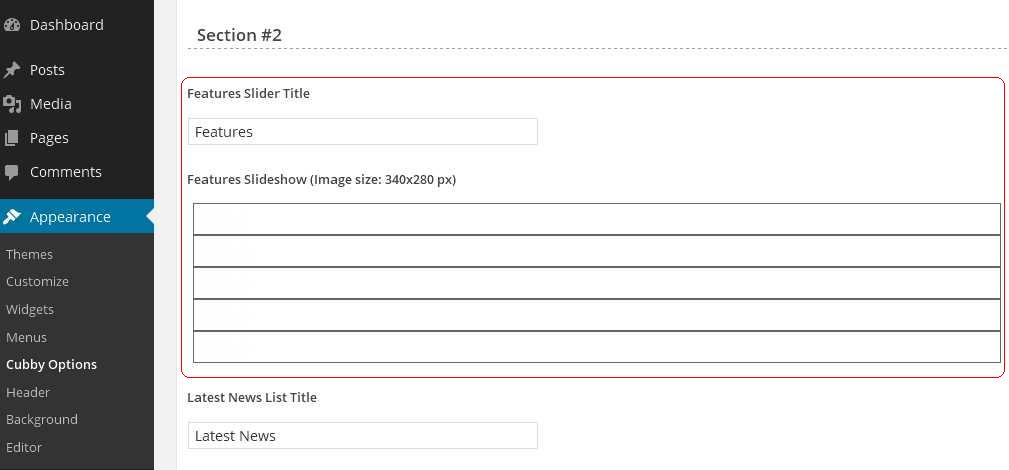
Go to Dashboard -> Appearance -> Cubby Options, navigate to Home Page. You are allowed to add at most 5 images to the Features Slideshow in the “Section#2” area. Upload images and edit the titles and links one by one in the select table.
[Tips.] Recommended image size: 340*280 px.
2) Latest News Setting
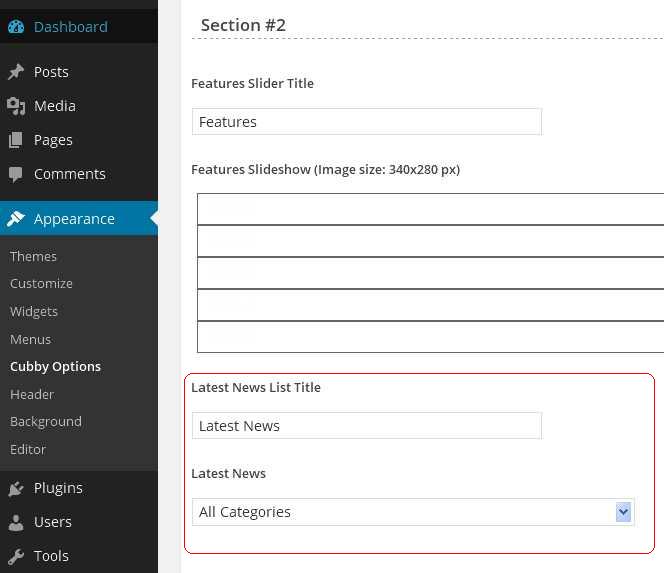
Go to Dashboard -> Appearance -> Cubby Options, navigate to Home Page. Move to the setting area under the slideshow table, edit your latest news title and decide its categories.
3) Purchase Link Setting
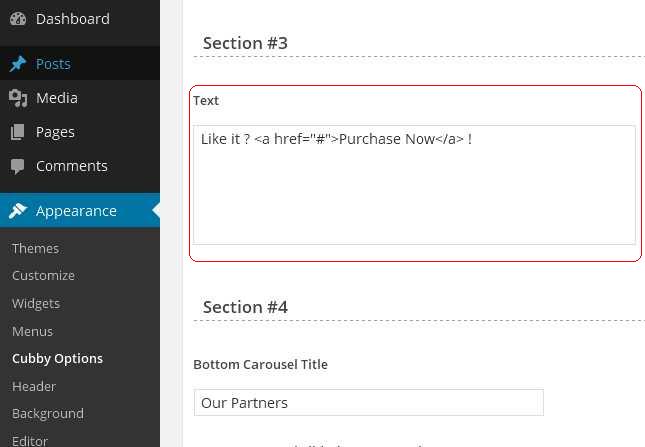
This area is designed for you to insert the purchase link of your products. Go to Dashboard -> Appearance -> Cubby Options, navigate to Home Page. Type in the texts with HTML codes as the existing example, or any content you want.
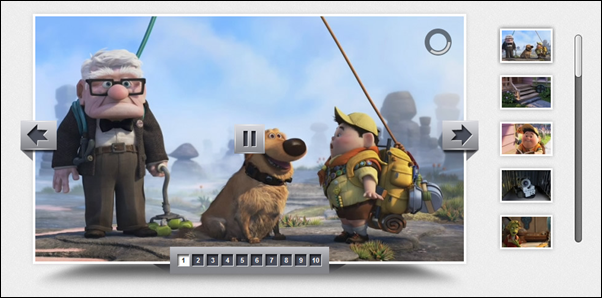
4. Bottom Carousel Slideshow Setting
This area is designed for you to introduce your business partners, and we applied a special carousel slideshow design, which allows the user to move the mouse flexibly.
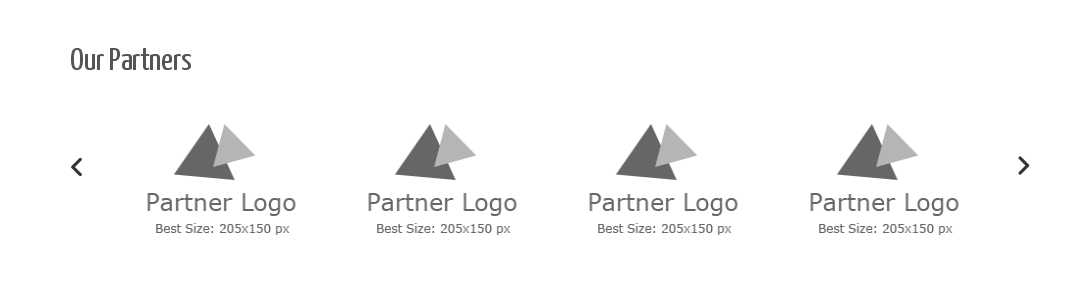
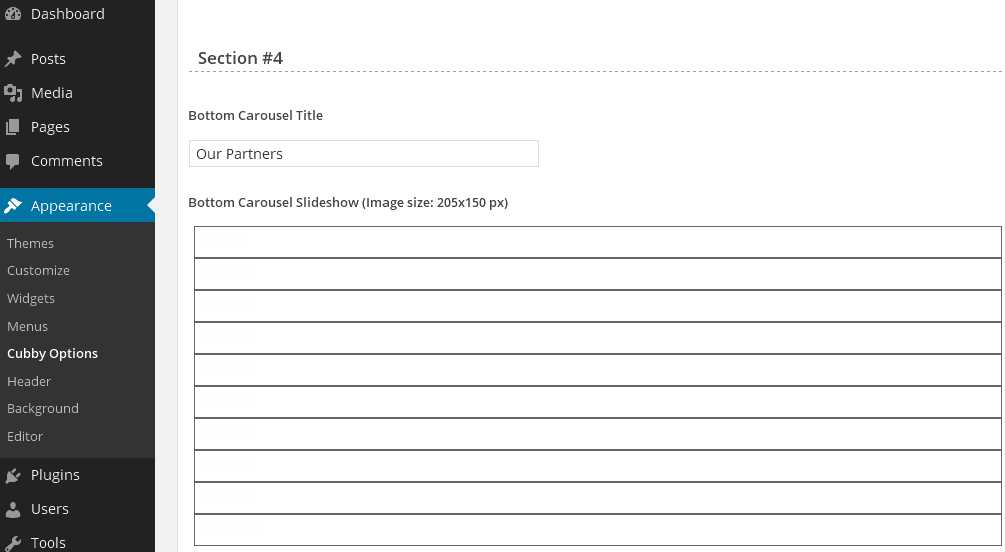
Go to Dashboard -> Appearance -> Cubby Options, navigate to Home Page. You are allowed to add at most 10 images to the carousel slideshow in the “Section#4” area. Upload images and edit the titles and links one by one in the select table.
[Tips.] Recommended image size: 205*150 px.
[Don’t forget to click on the Save Options button to ensure all your settings are saved.]
5. Footer Setting
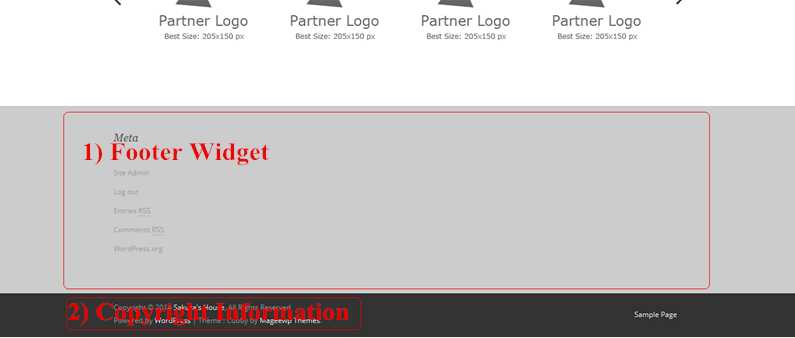
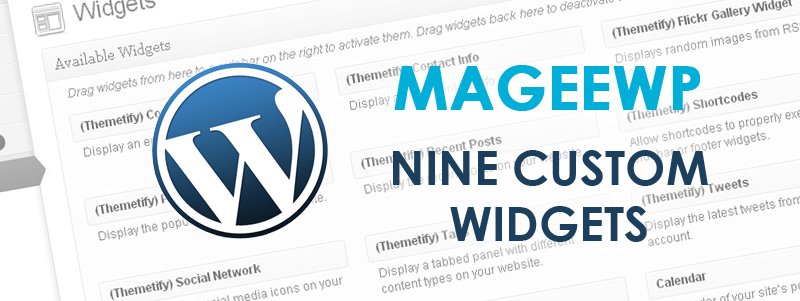
1) Footer Widget Editing
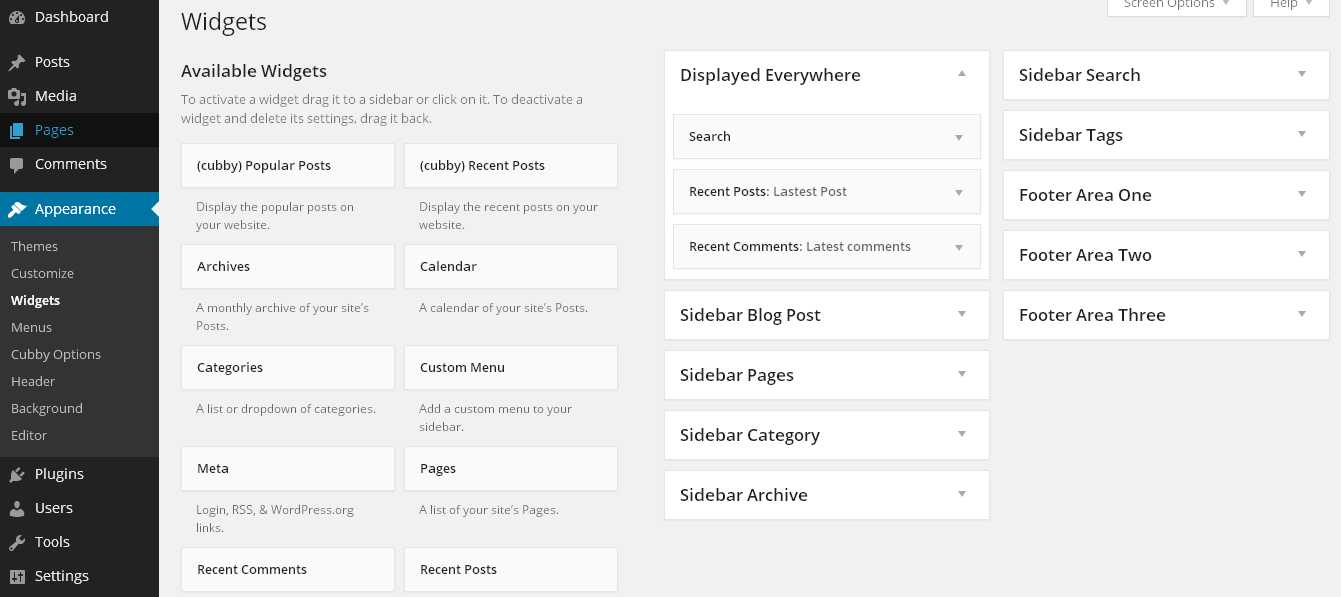
Go to Dashboard -> Appearance -> Widgets. You’ll find “Footer Area One”, “Footer Area Two”, and “Footer Area Three” on the right side. Select some “Available Widgets” you want and drag them to the Footer Areas. You can also hide these widgets and make your footer area clean. If you don’t need them anymore, just click on the Delete button.
2) Copyright Information (cannot be amended)
3) Footer Widget Background
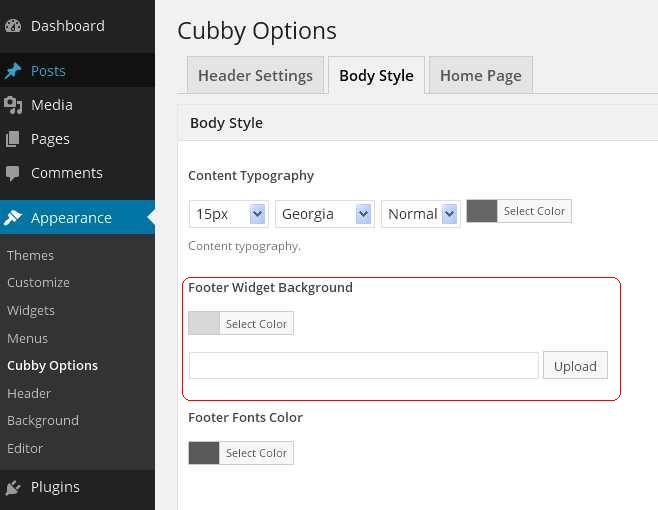
Go to Dashboard -> Appearance -> Cubby Options, navigate to Body Style. Change footer background’s color or upload an image if you prefer.
4) Footer Font Color
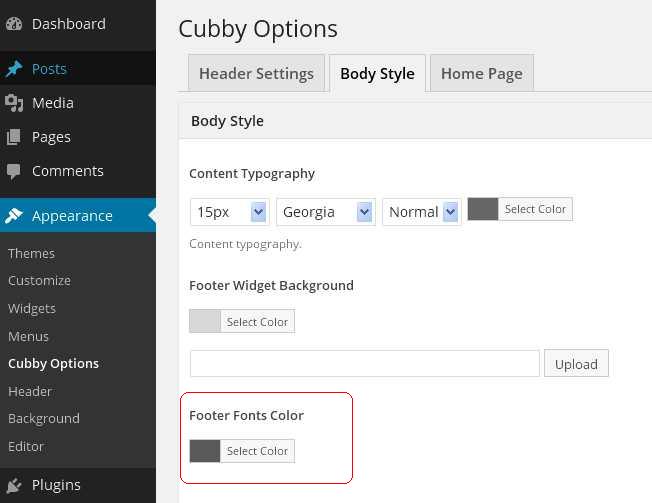
Go to Dashboard -> Appearance -> Cubby Options, navigate to Body Style. Change footer font color as you like.
[Don’t forget to click on the Save Options button to ensure all your settings are saved.]
[Tips.] While designing your footer background and font color, take the whole style of your website into consideration, in order to make your homepage looks comfortable.
6. Body Style Setting

Go to Dashboard -> Appearance -> Cubby Options, navigate to Body Style. Manage the body style in the “Content Typography” area.