How to Create Post Formats If Your WordPress Themes Don’t Have
A Post Format is a piece of meta information that can be used by a theme to customize its presentation of a post. More information you can see the What’s Post Format and How to Custom It. But, if your wordpress themes don’t have the post format you need, then what should you do? Don’t worry, I will introduce the tutorial below, you could have a try.
Setting Up Post Formats
Adding post formats to your theme is as simple as adding a function to WordPress with a list of which post formats you want to use.
The first thing to do is create a child theme. Using a child theme ensures that future updates to the theme will remain intact, though all of our customizations override the theme’s defaults.
For now, let’s just add a few more post formats to our theme. Create a “functions.php” file in your child theme’s directory if you haven’t already, and add this block of code.
function add_post_formats() { add_theme_support( 'post-formats', array( 'gallery', 'quote', 'video', 'aside', 'image', 'link' ) ); } add_action( 'after_setup_theme', 'add_post_formats', 20 );
You can add any post format you want from the list above, so choose the formats that fit your blog the best.
After you activate your child theme, you can visit the WordPress admin and and create a new post. You will see six post formats listed in the right sidebar. Select any of these to change a post to a specific post format, or just leave it at “Standard”. Before we move forward, I’d recommend adding a few dummy posts for each post format you are using with relevant content (A gallery, embedded video, etc.) so that you can see post formats in action.
Okay, we’ve set up our custom post formats. Now, it’s time to explore what we can do with them.
Styling Post Formats
The easiest way to get started with post formats is to use CSS to style each a little differently. By default, themes using the post_class function, which includes any theme from Elegant Themes, will output a special CSS class for each post that designate what their post format is. The class is structured as .format-(name). So, a video post will have the class:
.format-video
These classes are included on both index pages and individual post pages, and can be used to add unique styling in either location. Let’s start with something simple.
I want to change the background color for all my quote posts as well to highlight them a bit more. To do so, I open up my child theme’s “style.css” file and add:
.format-quote { background: #FFAADD !important; color: white; }
This will add a pink background to any post that has been assigned the “quote” post format. It will also change the text color to white. I made sure to add the “!important” flag to override the default settings of the theme.
Of course, this styling applies to posts in all contexts, on single posts, pages and the index page. If I want to make it so that this styling is only applied when a post is listed on the home page, we just need to add a little specificity. This time, I’m only going to apply my pink background when a post is listed on the homepage. I’m also going to remove the title of the post with CSS, so only the post content remains.
.home .format-quote { background: #FFAADD !important; color: white; } .home .format-quote .entry-title { display: none; }
CSS can be used to do quite a bit of work to change content based on format. I recommend browsing any themes listed on the site for a little inspiration.
Filtering Content Based on Post Formats
Styling CSS may be all you need to get post formats working for you. But if you’d like a bit more control, you can also edit templates directly to modify their output. Most themes, the crucial piece of code is usually found within the loop of post templates (e.g. index.php or single.php).
get_template_part( 'content', get_post_format() );
Get_template_part pulls a template from a specific PHP file, which can be altered based on post format. So if you want a special template for the aside format, you need only to create a content-aside.php file and start editing the loop’s content there
If you picked the right theme, then a lot of this work will be done for you, but it can be useful to add some extra functionality. For instance, I added the “link” format in the first step. My link posts are very simple, and contain only a title and a single link.
What I’d really like to do is pull this URL, and link my title directly to an external page when the post is listed on my homepage, instead of forcing users having to visit a single post, then following the link. That is beyond the scope of just CSS and will require us to use a template.
Getting Our Styles Ready
We’ll need a little bit of custom CSS so that we can call out link posts a bit to make sure users know they are being directed away from the site. I want to make sure that the title of a post has a color that matches the rest of the links on my site, and change the background a bit. I also want to use a link icon before the title.
The first thing to do is to create an images folder in your child theme, then save the link image above in there as “link.png”. Next, we’ll add a bit of CSS that will make sure our content looks unique.
.home .format-link { background: #eee !important; } .home .format-link .entry-title h2 { color: #6ba7a5; } .home .format-link .entry-title h2:before { display: inline-block; content: " "; background: url(images/link.png); width: 75px; height: 56px; } .home .format-link .entry-title p { text-align: center; }
Here, we are editing the color of the background and text for link posts. We are then using the :before pseudo-selector to add the link icon just before the title of the post.
Adding Our Link Grab Function
In order to link our posts directly to an external link, we will need to create a function that grabs the first link from a post’s content, and returns the URL for us to use. Then, we can use that URL in our post format template to link a title directly to an external page.
Open up the “functions.php” file in your child theme folder and add this function:
function get_my_url() { if ( ! preg_match( '/<a\s[^>]*?href=[\'"](.+?)[\'"]/is', get_the_content(), $matches ) ) return false; return esc_url_raw( $matches[1] ); }
All this function does is sort through the content of your post and search for an a href=tag. It then pulls out the URL from inside this and returns it back for you. We’ll be using this in the next step.
Setting Up Our Link Template
Next, we’ll need to actually create our template for the link post format. To do so, we have to create a file called “content-link.php” in our child theme’s folder. This will take any posts with the post format “Link” and use this file to render its content, instead of the default template. Right now, this template is blank so it doesn’t do much just yet. Let’s add our code.
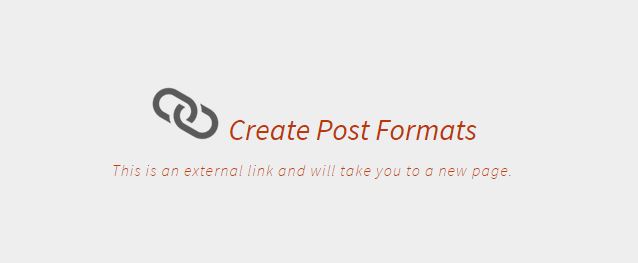
<article id="post-<?php the_ID(); ?>" <?php post_class( 'entry' ); ?>> <div class="container clearfix"> <header class="entry-title"> <?php if ( is_single() ) { ?> <h1><?php the_title(); ?></h1> <?php } else { ?> <?php $myLink = get_my_url(); ?> <h2> <a href="<?php echo $myLink; ?>"><?php echo the_title(); ?></a> </h2> <p>This is an external link and will take you to a new page.</p> <?php } ?> <?php et_fable_post_meta(); ?> </header> </div> <!-- .container --> <?php if ( is_single() ) : ?> <?php get_template_part( 'includes/share', get_post_format() ); ?> <?php endif; ?> </article> <!-- .entry-->
In the end, we end up with a different look for link posts on our homepage.
This is, of course, just the beginning. There is a lot that can be done with post format templates to edit and modify the output of your posts based on post formats, allowing for a full range of content.
Permalinks
The last trick I’ll share with you is how to organize your posts according to post format. WordPress comes with a handy function, get_post_format_link that allows you to link to a page that only includes posts from a specific post format. To use it, simply use this function in any template file.
<?php echo esc_url( get_post_format_link( 'link' ) ); ?>
This will provide a link to a list of “Link” posts. Switch out the name of the post format to match which post format you are linking to. This can be useful in navigation, or grouping together posts. If your blog makes heavy use of post formats, it can be a great way to organize content.


