Use Htaccess to Improve WordPress Security
WordPress installation is simple and quick, but we often miss out a few important security factors. For example, directory browsing and using the ‘admin’ username are considered serious security loopholes. Today we’re going to take a look at 8 .htaccess code snippets which will help improve your WordPress blog’s security.
What is the .htaccess file?
A .htaccess (hypertext access) file is a directory-level configuration file supported by several web servers, that allows for decentralized management of web server configuration. They are placed inside the web tree, and are able to override a subset of the server’s global configuration for the directory that they are in, and all sub-directories.
The original purpose of .htaccess—reflected in its name—was to allow per-directory access control by, for example, requiring a password to access the content. More commonly, however, the .htaccess files override many other configuration settings such as content type, character set, CGI handlers, etc.
For wordpress, an htaccess file is an optional configuration file for the Apache web server to interpret, for each directory. You can store various settings in that file such as: password protect a directory, block IPs, block a file or folder from public access, etc. Traditionally, the .htaccess file is present in the base WordPress installation directory. It stores the permalink structure by default.
TIP: Before you start with the tutorial, make sure to backup the current .htaccess file (if present) in a cloud storage service like Dropbox. This is to roll back to the last known working .htaccess file, if a certain code snippet breaks your site. Let’s begin.
1. Deny Access to .htaccess from Outside
In order to protect the important server control file .htaccess from outside attacks, we’ll restrict access to (S)FTP.
# Deny access to .htaccess and .htpasswd if in use
<FilesMatch "(\.htaccess)">
 Order deny,allow
 Deny from all
</FilesMatch>
2. Prevent Image Hotlinking
The so-called hotlinking of images can become a real problem. Hotlinking means that people don’t even bother to download the images from your website to link them from their own space afterwards. Instead, hey just specify the path to your image and call them from your site into their pages, which can slow down performance and snitch necessary bandwidth. With the following code, you can easily prevent external linking.
Replace “yourwebsite.com” with the URL of your website. The last line shows the path to an image that appears instead of the linked picture. You can replace it with any other image. Some really nasty things can be done this way.
RewriteEngine on
RewriteCond %{HTTP_REFERER} !^$
RewriteCond %{HTTP_REFERER} !^http(s)?://(www\.)?yourwebsite.com [NC]
RewriteCond %{HTTP_REFERER} !^http(s)?://(www\.)?yourwebsite.com [NC]
Please keep in mind that if you have an external feed provider like Feedburner, you may not see any images in the feed.
3. Activate Browser Caching
Hardly any other tuning method achieves as good results as this one with as little effort. Many large files of your website virtually never change. Therefore, it’s a good idea to store them in the browser cache. Cached files like CSS or JavaScript load faster as they only have to load once during the first visit. If your visitor returns to the site again (or any other sites for the first time), the browser doesn’t need to reload these files, thus improving the loading performance of the website.
## EXPIRES CACHING ##
<IfModule mod_expires.c>
ExpiresActive On
ExpiresByType image/jpg "access 1 year"
ExpiresByType image/jpeg "access 1 year"
ExpiresByType image/gif "access 1 year"
ExpiresByType image/png "access 1 year"
ExpiresByType text/css "access 1 month"
ExpiresByType text/html "access 1 month"
ExpiresByType application/pdf "access 1 month"
ExpiresByType text/x-javascript "access 1 month"
ExpiresByType application/x-shockwave-flash "access 1 month"
ExpiresByType image/x-icon "access 1 year"
ExpiresDefault "access 1 month"
</IfModule>
## EXPIRES CACHING ##
4. Allow only Selected IP Addresses to Access wp-admin
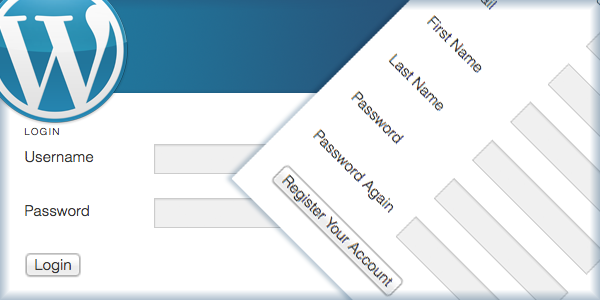
The wp-admin folder contains the files required to run the WordPress dashboard. In most cases, your visitors don’t need access to the WordPress dashboard, unless they want to register an account. A good security measure is to enable only a few selected IP addresses to access the wp-admin folder. You can allow the IPs of the people who need access to the WordPress dashboard – editors, contributors and other admins. This code snippet allows only fixed IPs to access the wp-admin folder and denies access to the rest of the world.
# Limit logins and admin by IP
<Limit GET POST PUT>
order deny,allow
deny from all
allow from 302.143.54.102
allow from IP_ADDRESS_2
</Limit>
Please keep in mind that you need to replace the IP addresses in the code.
Make sure that you create a new .htaccess file and paste it in the wp-admin folder and not the base installation directory. If it’s the latter, no one except you will be able to browse you site – not even search engines! You certainly do not want that. A couple of downfalls of this measure is as follows:
- If your site allows or promotes new user registration, it would be nearly impossible to keep track of the number of users.
- People with dynamic IP addresses (mostly ADSL broadband users using PPP or PPPoE protocols) have their IPs changed, every time they logout and login to their ISP. Certainly it would be impractical to keep track of all these IPs and add them to the htaccess file.
- Mobile broadband: Whether you’re on 3G or 4G, your IP address depends on current cell tower you’re connected to. Say you’re travelling – your IP will be constantly changing with every couple of miles you move from the origin. Again, keeping track for the htaccess file is nearly impossible.
- Public Wi-Fi Hotspots: Using credentials when connected to the Internet using a public Wi-Fi hotspot is a big no-no, since a kid with a tiny software can extract every character you type. Not to mention, each Wi-Fi hotspot will have a unique IP address.
Thankfully, all these disadvantages (save the first one), can be rectified by using a VPN. If you set your VPN to connect using only a single IP address, then you can just add it to your htaccess file, and all your problems will be solved.
5. Block Include Only Files
There are some really important files that should never be accessible from outside WordPress. Protect your files with the following code:
# Block the include-only files.
<IfModule mod_rewrite.c>
RewriteEngine On
RewriteBase /
RewriteRule ^wp-admin/includes/ - [F,L]
RewriteRule !^wp-includes/ - [S=3]
RewriteRule ^wp-includes/[^/]+\.php$ - [F,L]
RewriteRule ^wp-includes/js/tinymce/langs/.+\.php - [F,L]
RewriteRule ^wp-includes/theme-compat/ - [F,L]
</IfModule>
Please keep in mind that this code doesn’t work with a WordPress multisite installation.
6. Protect the Wp-content Folder
The wp-content folder is the most important WordPress folder as it contains your themes, plugins, images, cached files, etc. This makes it the major target for hackers, so it should be well protected.
Create a separate .htaccess file, add the following code and upload the file into the wp-content folder (www.yourwebsite/wpcontent/).
 Order deny,allow
 Deny from all
 <Files ~ ".(xml|css|jpe?g|png|gif|js)$">
 Allow from all
 </Files>
7. Disable the XML-RPC Interface
With the XML-RPC interface, you can manage WordPress with external programs and publish articles or edit comments. These include mobile applications for iOS, Android and Co. as well as Windows LiveWriter and other software. The interface can also be misused for DDoS attacks, which can shut your website down. You should disable the interface with a short entry in .htaccess:
<Files xmlrpc.php>
 Order Deny,Allow
 Deny from all
</Files>
Use the above code only if your website has no blog functionality because trackbacks won’t have access either. If you have a blog or want to use your WordPress with mobile applications, use the following code to protect the interface:
<IfModule mod_setenvif.c>
 <Files xmlrpc.php>
 BrowserMatch "Poster" allowed
 BrowserMatch "WordPress" allowed
 BrowserMatch "Windows Live Writer" allowed
 BrowserMatch "wp-iphone" allowed
 BrowserMatch "wp-android" allowed
 Order Deny,Allow
 Deny from All
 Allow from env=allowed
 </Files>
</IfModule>
In this example, the following clients are unblocked (from top to bottom):
- Poster
- WordPress blogs
- Windows Live Writer
- WordPress for iOS
- WordPress for Android
Delete clients you don’t need. You can also add new user agents and unblock them.
8. PHP – Block Error Reports
This is a very important point. When PHP sends an error report, the file path becomes visible. Sergej Müllers describes it as follows:
“In WordPress blogs it’s fairly easy to (indirectly) create a PHP error to get an error report and path, without being an administrator or expert. Calling up certain WordPress core or plugin files in the address bar of the browser creates PHP fatal errors (because necessary and referenced WordPress functions are missing). If server or PHP settings allow errors to be displayed, they will appear in the browser. Hardly anyone can decrypt error reports, but they are valuable information for hackers to find holes and make full use of them.”
Solve this problem with a simple addition to the .htaccess file:
php_flag display_errors Off
Conclusion:
Today we’ve learnt some of the coolest htaccess hacks to strengthen your WordPress site. I would suggest you to try out each module one by one while taking a backup of the .htaccess file before and after testing each module. This is because the .htaccess file is very critical. A missing ‘#’ character or misplaced ‘</IfModule>’ could destroy your site’s integrity. If you access your WordPress dashboard frequently on-the-go, it’s recommended not to enable selective IPs to your wp-admin folder.